1. Unwanted Photo Tags
It’s happened to all of us — we’ve all been tagged in an unflattering or inappropriate image at some point.
Don’t panic though, we will take you through first how to get rid of that unwanted tag, and then how to manage your privacy settings so it doesn’t happen again.
2. Untagging
To “untag” yourself in an image, hit the pencil icon on the top right.
Select “Remove tag.”
3. Remove Tag Options
You now have two pop-ups to negotiate that inform Facebook why you’re de-tagging the image.
The first screen gives you the choice of quietly removing the tag, asking the person who tagged you to remove the tag, or block the tagger.
4. Why You Want the Tag Removed
The next options look at why you want the tag removed.
If it’s simply an unflattering or undesirable image select the first option and hit “Continue.”
5. Privacy Settings
Now we can delve into Facebook’s ever changing privacy options to manage any tagged images in the future.
Select “Privacy Settings” from the drop-down menu on the top right of your Facebook page.
6. Edit Tag Settings
Hit “Edit Settings” next to the “How tags work” section.
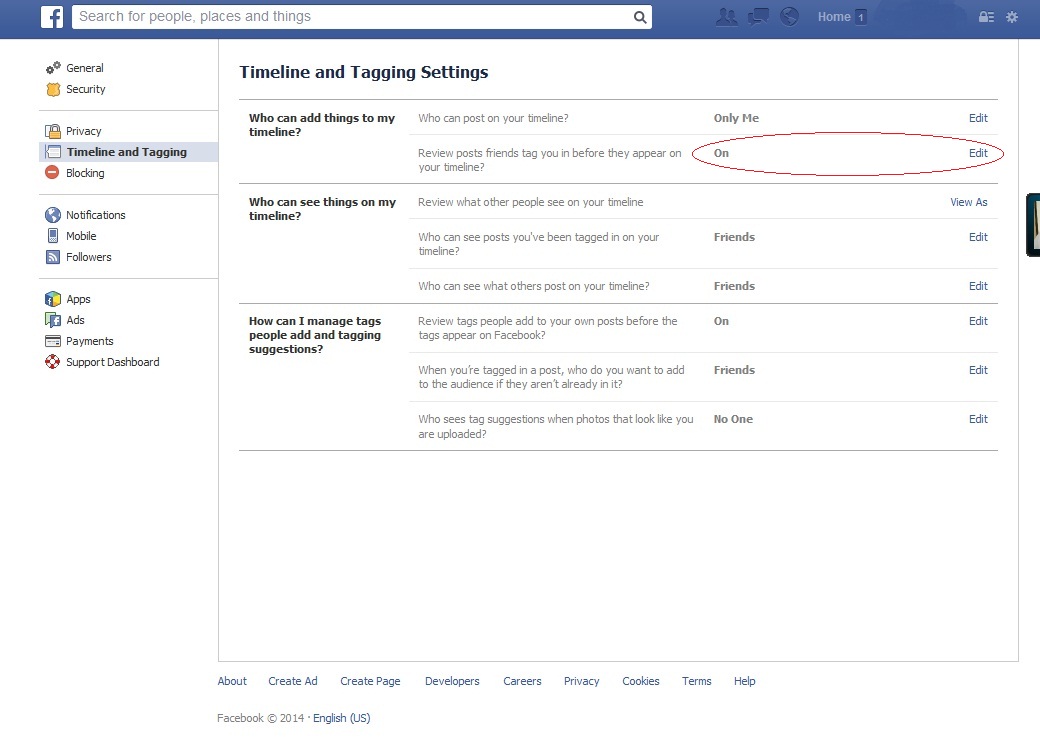
7. How Tags Work You’ll now see a list of options you can tweak to suit your privacy preferences.
8. Timeline Review
The first is “Timeline Review”. Enabling this will mean you can manually review every single post you’re tagged in before it shows up on your Timeline.
9. Tag Review “Tag Review”
works the same way for photo tags.
Enable this to review photo tags before they appear on your Timeline.
10. Tag Suggestions
“Tag Suggestions” is a little different.
This is Facebook’s facial recognition tool that will, in theory, spot you in an image and suggest tagging you to whichever of your friends uploaded it.
You can turn this off altogether by selecting “No one,” or allow suggestions to show up to your friends.
11. Activity Log Notifications
If you’ve enabled the review options, now when someone tags you, you have to manually approve the tag.
These numbered alerts will show up in your “Activity Log” below your
cover photo.
Click on the box to view the alerts.
12. Approve Tags
The next screen gives you the option to approve or ignore the tag.
If you select “Ignore,” the content won’t appear on your Timeline.
Be aware that you still have to click through to the image to remove the tag (as per the instructions starting.)
13. Maximum Timeline
Visibility The settings we’ve covered here are recommended to make sure only content you want appears on your Timeline, but you can take things a step further.
If you’re looking to always hide activity from certain people, you can control who can see your tagged posts and photos after they appear on your Timeline.
Head to your “Privacy Settings” (from the drop-down menu on the top
right of your Facebook page and select “Edit Settings” next to the “How Tags Work” section.
Now click on the drop-down menu next to the “Maximum Timeline Visibility” section and hit “Custom.”
14. Custom Privacy
Here you can hide tagged posts that appear on your Timeline from from certain people (or lists you’ve already set up).
15. Hiding Tagged Posts
Now you’ll see (from your “Activity Log” view) that approved tagged posts are visible to your friends — minus the people you added to the “Hide” option.
HAVE FUN
@donibar
